There is a specific, undeniable aroma that hits you the moment you walk into a Little Caesars pizzeria. It is the scent of yeast, high-heat toasted dough, and a pungent, buttery garlic glaze that lingers in the air. For many home cooks, replicating that exact experience—the pillowy texture and that iconic “snowy” parmesan finish—feels like a culinary mystery.
This recipe is designed to bridge the gap between fast-food convenience and gourmet home baking. We aren’t just making bread; we are engineered a specific sensory experience. By focusing on the forensic details of the Little Caesars style, from the toasted bubbles on the crust to the translucent glistening of the salted butter glaze, you can now recreate these legendary breadsticks in your own kitchen.
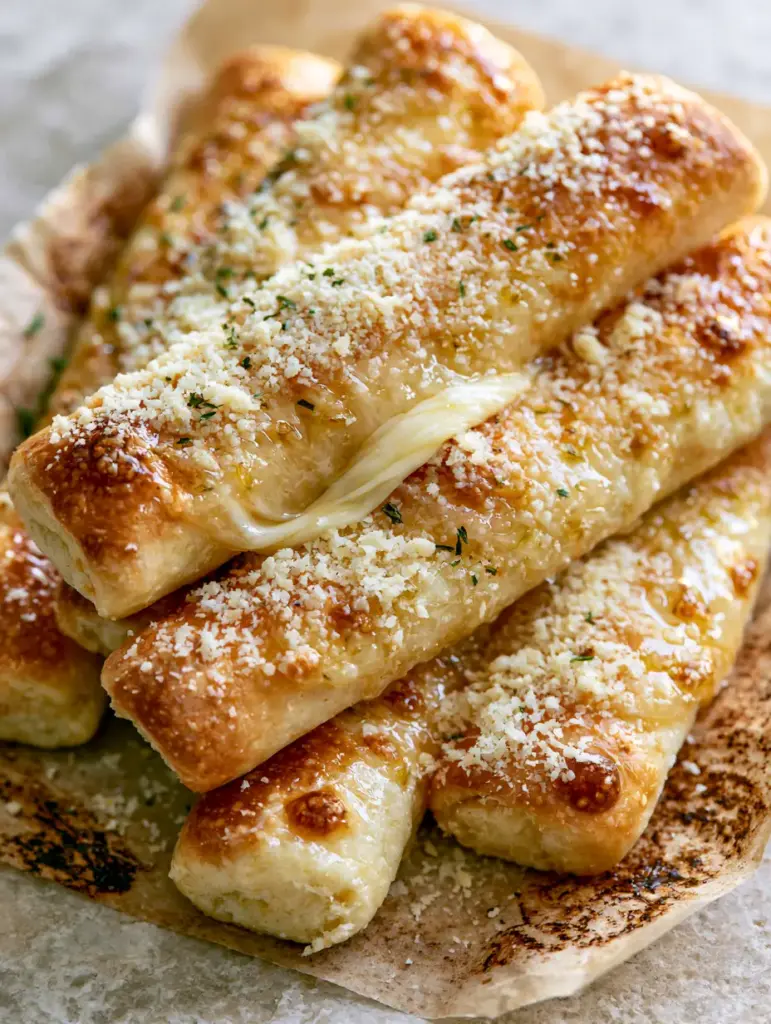
Every element in this guide is visually verified. If you have ever craved that thick, stretchy mozzarella cheese pull seen in professional food photography, this is the blueprint you need. We have meticulously balanced the hydration of the dough with a high-temperature bake to ensure your breadsticks are soft on the inside while maintaining a structural golden-brown exterior that holds up to a heavy dousing of garlic butter.
Why This Homemade Little Caesars Recipe Dominates Your Dinner Table
Creating a Little Caesars copycat at home isn’t just about saving a few dollars; it’s about controlling the quality of the ingredients to achieve a superior flavor profile. Here is what you can expect from this visually stunning and scientifically sound recipe:
- The Perfect Texture: A pillowy, airy crumb that mimics the famous “Crazy Bread” but with the added decadence of a molten mozzarella center.
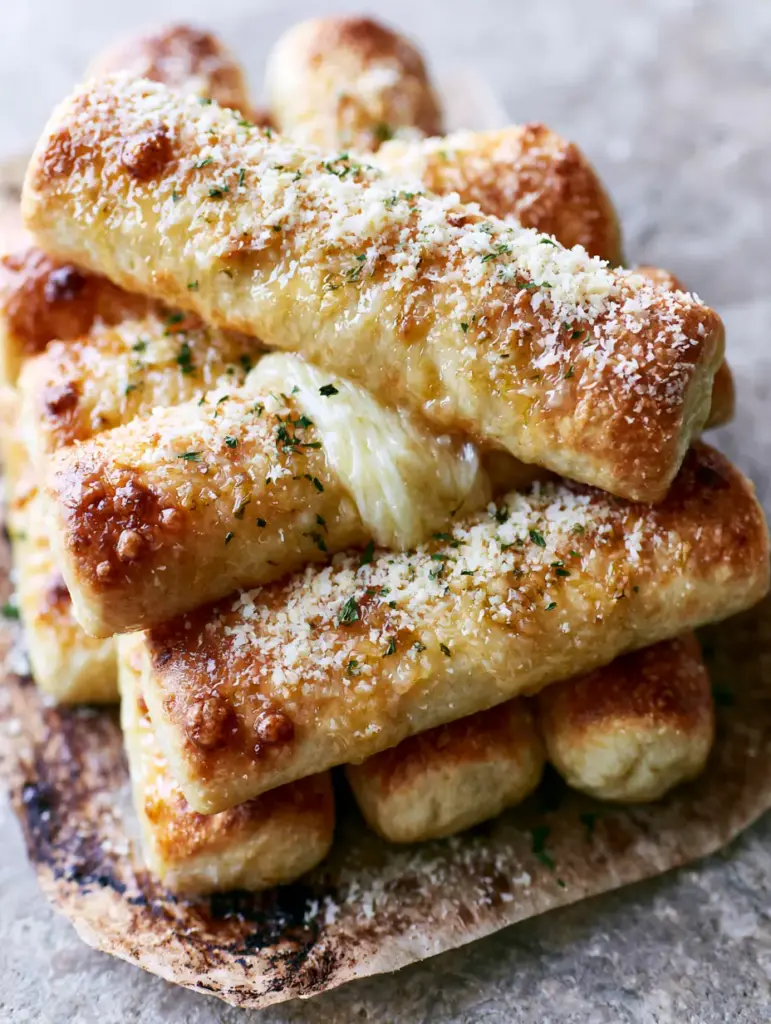
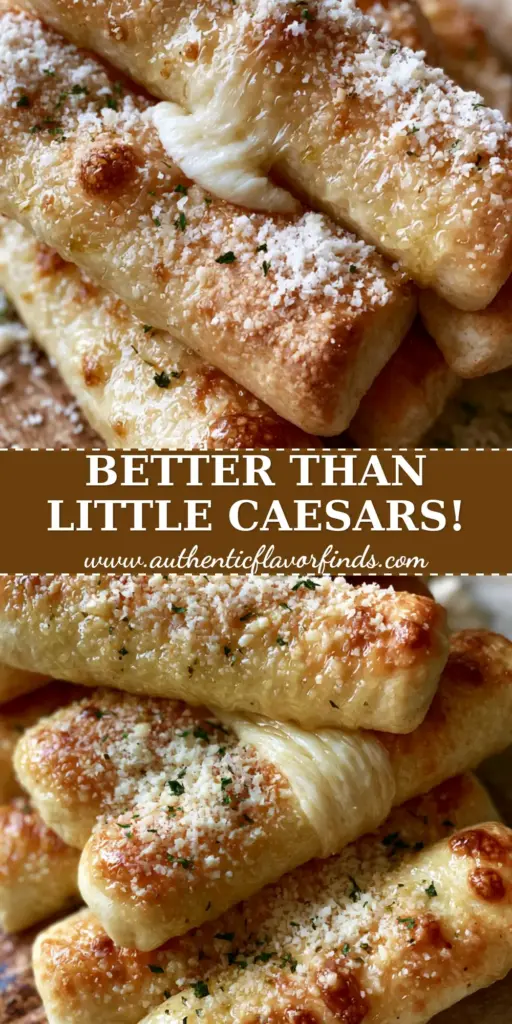
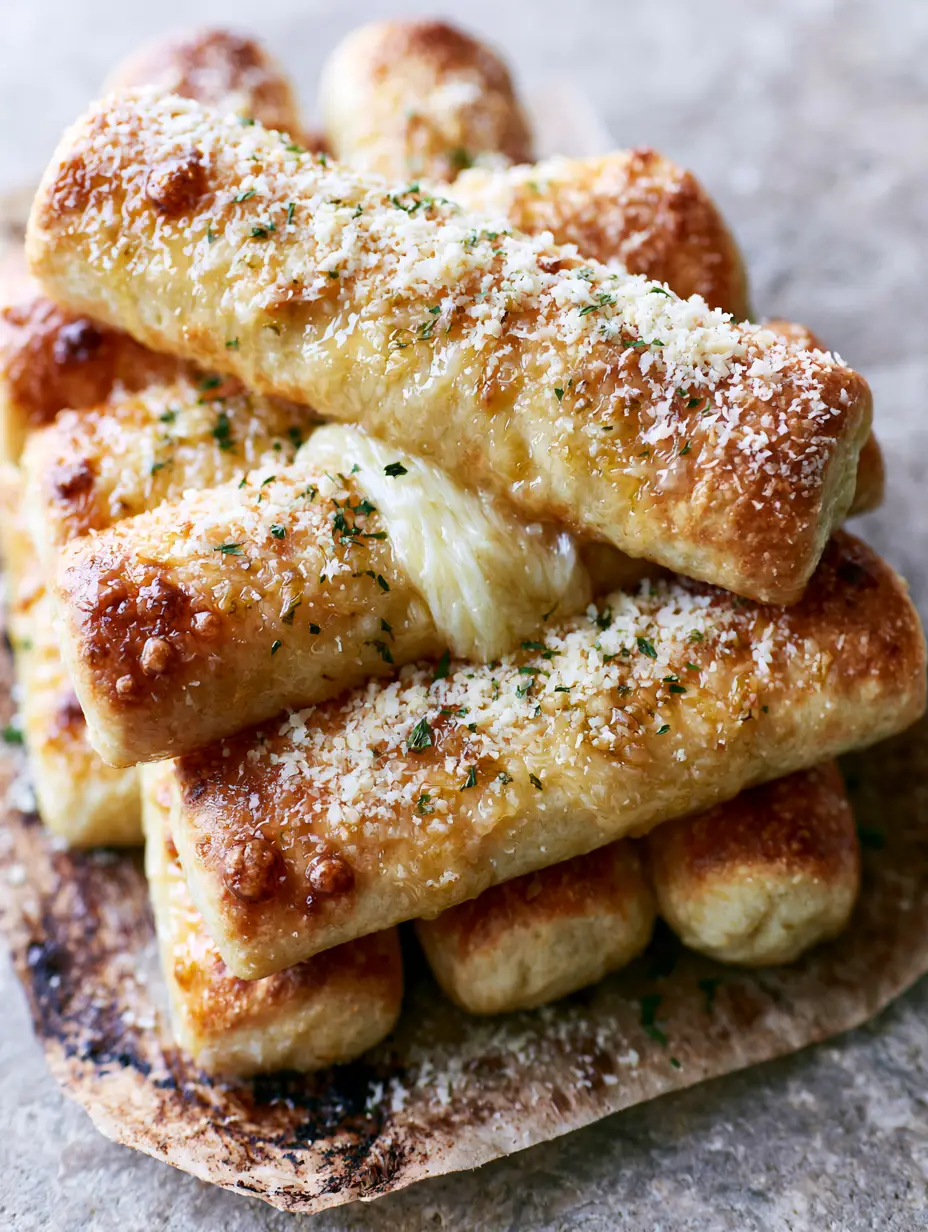
- Visual Authenticity: A golden-brown exterior featuring slight toasted bubbles and a heavy glistening coating of melted garlic butter.
- Flavor Depth: We use a combination of fresh minced garlic bits and fine-grated parmesan cheese to create layers of salty, savory satisfaction.
- The Iconic Dip: A warm, vibrant red marinara sauce that provides the necessary acidity to cut through the rich, salted butter glaze.
Essential Components for the Perfect Pillowy Dough
To achieve the specific structural integrity required for a Little Caesars style breadstick, we must use ingredients that promote both elasticity and browning. Each component serves a forensic purpose in the final bake.
Bread Flour: 3.5 cups (435g). Bread flour has a higher protein content than all-purpose flour, which is essential for creating the gluten network that traps air and creates that “pillowy” bounce back.
Warm Water: 1.25 cups (300ml). Temperature is critical here; the water should be between 105°F and 115°F (40°C – 46°C) to activate the yeast without killing the living cultures.
Active Dry Yeast: 2.25 tsp (7g). This is the engine of our recipe, providing the leavening power needed for the breadsticks to rise rapidly in a hot oven, creating those signature toasted bubbles.
Granulated Sugar: 1 tbsp (12g). Sugar acts as food for the yeast and, more importantly, facilitates the Maillard reaction, ensuring a deep golden-brown hue on the crust.
Kosher Salt: 1.5 tsp (9g). Salt tightens the gluten structure and enhances the natural flavor of the wheat, preventing the dough from tasting flat or bland.
Extra Virgin Olive Oil: 2 tbsp (30ml). Adding fat to the dough tenderizes the crumb and allows the dough to be stretched thinly enough to wrap around the cheese without tearing.
Low-Moisture Mozzarella: 8 oz (225g), cut into long strips. Using low-moisture cheese is the secret to the ultimate stretchy cheese pull, as it melts smoothly without releasing excess water into the dough.
Salted Butter: 1/2 cup (115g). We use salted butter for the glaze to provide that hit of sodium that Little Caesars is famous for; it should be melted until translucent and glistening.
Fresh Garlic: 3 cloves, finely minced. The minced garlic bits provide a textural contrast and a pungent kick that dried powder simply cannot replicate.
Parmesan Cheese: 1/4 cup (25g), fine-grated. This should be “snowy” in texture, providing a salty, umami-rich coating that sticks to the butter glaze.
Dried Parsley: 1 tsp (1g). The tiny green flecks add a visual pop of color and a subtle earthy note to the finish.
Must-Have Kitchen Tools for That Pizzeria Finish
Achieving a professional Little Caesars result requires more than just the right ingredients; it requires the right environment for those ingredients to transform. You will need a large mixing bowl to allow the dough space to double in size during the first rise.
A heavy-duty baking sheet lined with rustic grease-stained parchment paper is vital. The parchment paper not only prevents sticking but also helps distribute heat evenly to the bottom of the sticks. A pastry brush is non-negotiable for applying the thick coating of garlic butter, ensuring every crevice of the golden-brown crust is glistening.
The Step-by-Step Blueprint to Golden-Brown Perfection
Phase 1: Activating the Yeast and Dough Development
In the bowl of a stand mixer, combine the warm water (300ml) and sugar. Sprinkle the yeast over the surface and let it sit for 5 to 10 minutes. You are looking for a foamy, bubbly head to form—this is the sensory cue that your yeast is alive and ready to work.
Add the olive oil and salt, then gradually incorporate the bread flour. Using the dough hook, knead the mixture on medium-low speed for about 5-7 minutes. The dough should transition from a shaggy mass to a smooth, elastic ball that clears the sides of the bowl. If it feels too tacky, add flour one tablespoon at a time.
Phase 2: The First Rise and Flavor Maturation
Place the dough in a lightly oiled bowl and cover with a damp cloth. Allow it to rise in a warm, draft-free spot for 60 to 90 minutes. You want the dough to at least double in size. This fermentation period is where the “pillowy” texture is born, as the yeast produces carbon dioxide gas that stretches the gluten.
Phase 3: Shaping and Stuffing the Breadsticks
Punch down the risen dough to release excess gas. Turn it out onto a lightly floured stone countertop. Divide the dough into 12 equal portions. Roll each portion into a rectangle. Place a strip of mozzarella in the center and fold the dough over, pinching the seams tightly to seal. This ensures the cheese stays inside until that first glorious bite.
Phase 4: The High-Heat Bake
Preheat your oven to 425°F (220°C). Arrange the stuffed sticks on your parchment-lined tray. Let them rest for another 15 minutes to puff up slightly. Bake for 12-15 minutes. Watch for the visual cue: the crust should be a deep golden-brown with slight toasted bubbles appearing on the surface.
Phase 5: The Signature Little Caesars Glaze
While the breadsticks bake, melt your salted butter and stir in the finely minced garlic. The moment the breadsticks come out of the oven, use a pastry brush to apply a heavy, glistening coating of the garlic butter. While the butter is still wet, shower the pile with a generous dusting of snowy fine-grated parmesan and the dried parsley flecks.
Professional Secrets for the Best Stretchy Cheese Pull
To get that Instagram-worthy cheese pull, the temperature of the cheese is paramount. Serve these breadsticks immediately after glazing; as the mozzarella cools, it begins to lose its elasticity. If you are preparing these for a crowd, keep them in a warm oven (200°F/95°C) until the very moment of service.
Another tip is to ensure your dough is rolled to a consistent thickness. If the dough is too thick, it will insulate the cheese too much, preventing it from melting fully. If it’s too thin, the cheese might burst through. Aim for a 1/4 inch (6mm) thickness before rolling around the mozzarella.
Maintaining That Fresh-Baked Glistening Texture
These breadsticks are best enjoyed fresh, but if you have leftovers, they can be stored in an airtight container in the refrigerator for up to 3 days. To reheat and maintain that Little Caesars texture, avoid the microwave, which can make the dough rubbery.
Instead, place them in a toaster oven or a conventional oven at 350°F (175°C) for 5-8 minutes. This will re-melt the cheese and crisp up the exterior. You may want to apply a fresh brush of melted butter after reheating to restore the glistening visual appeal.
What to Serve with These Buttery Garlic Sticks
These breadsticks are a powerhouse on their own, but they truly shine when paired with complementary textures and flavors. For a full Italian-inspired spread, consider serving them alongside a creamy zucchini and cheese casserole or a crisp traditional Greek salad to balance the richness of the butter.
If you are hosting a game day, these breadsticks pair beautifully with other finger foods like spicy pickle poppers or even savory cowboy butter steak bites. The combination of the soft bread and the protein-heavy bites creates a satisfying variety for your guests.
Your Most Pressing Breadstick Questions Answered
Yes, you can use pre-made pizza dough. However, ensure it is at room temperature before stretching to achieve the signature pillowy texture and toasted bubbles.
Use low-moisture mozzarella sticks or blocks cut into strips. Avoid fresh mozzarella packed in water, as it will make the dough soggy and won’t stretch as well.
Use a microplane or a very fine grater to grate high-quality parmesan. Apply it immediately after the butter glaze so it sticks to the glistening surface.
While the breadsticks are delicious on their own, a warm red marinara dip provides the acidic balance needed for the rich, salted garlic butter coating.
This is usually due to the oven temperature being too low. Ensure your oven is fully preheated to 425°F (220°C) to trigger the Maillard reaction quickly.
The Ultimate Little Caesars Copycat Recipe Card
Little Caesars Copycat Crazy Bread: The Ultimate Stuffed Garlic Breadsticks Recipe
Ingredients
Equipment
Method
- Combine warm water and sugar in mixer; sprinkle yeast and wait 10 minutes until foamy.
- Add oil, salt, and flour. Knead for 5-7 minutes until smooth and elastic.
- Place in oiled bowl, cover, and let double in size (60-90 minutes).
- Divide dough into 12 pieces. Roll out, place mozzarella strip, and pinch seams tight.
- Preheat oven to 425°F (220°C). Bake on parchment for 12-15 mins until golden-brown with toasted bubbles.
- Brush with melted garlic butter and shower with parmesan and parsley while hot.
Notes
Reheat leftovers in a 350°F (175°C) oven to restore crispness.
Conclusion: Bringing the Pizzeria Home
Recreating the magic of Little Caesars at home is a rewarding challenge for any home cook. By focusing on the visual cues of golden-brown dough and the sensory delight of garlic-infused butter, you’ve created something far superior to the drive-thru version. The combination of the soft, pillowy dough and the sharp, salty parmesan creates a flavor profile that is truly addictive.
We would love to see your results! Did you get that perfect cheese pull? Let us know in the comments below. Don’t forget to follow us on Pinterest and share your creations with the community. Happy baking!