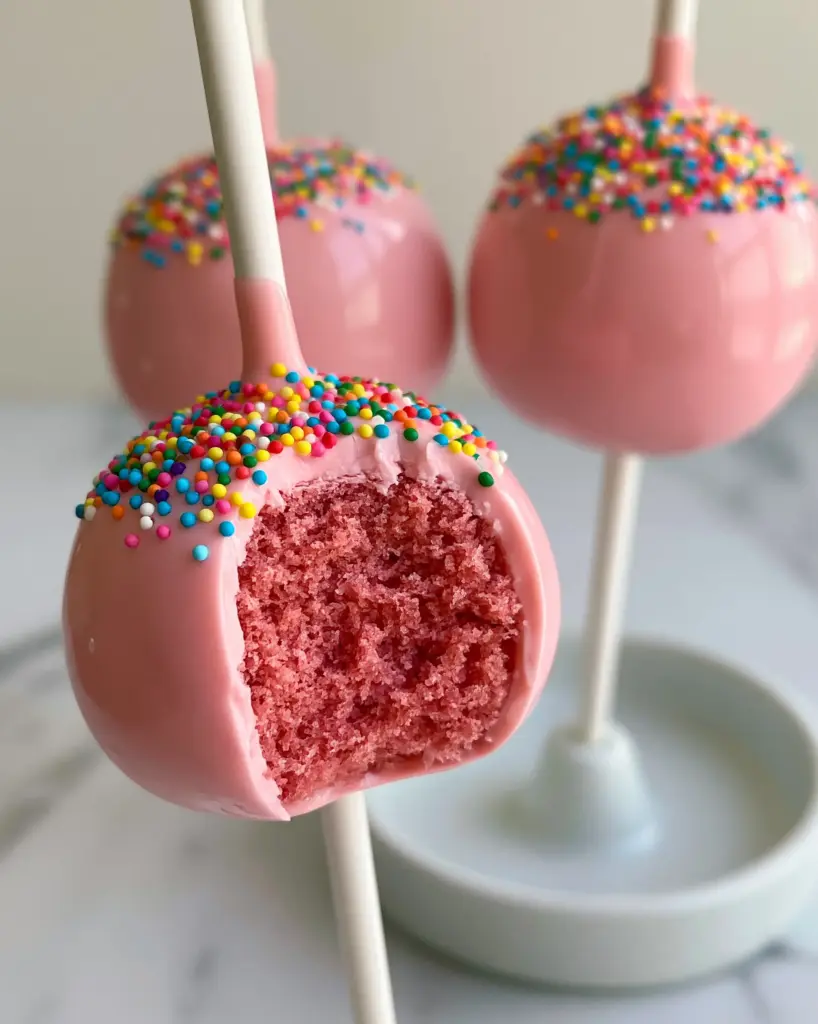
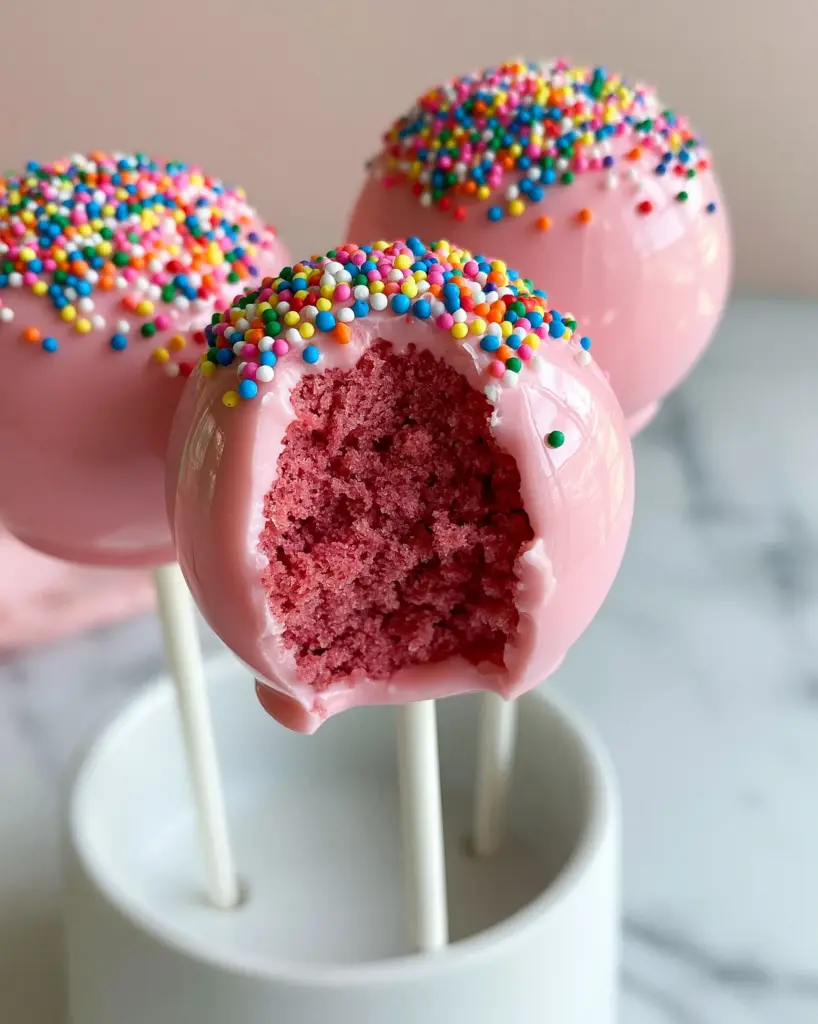
There is nothing quite as festive as Birthday Cake Pops. These handheld treats have taken the dessert world by storm, combining the moist, concentrated flavor of a gourmet cake with the snap of a professional candy shell. Imagine holding a perfectly round, pastel pink sphere that yields to a vibrant, moist pink vanilla center with every bite.
Our recipe focuses on achieving that professional “boutique bakery” look right in your home kitchen. We aren’t just making cake on a stick; we are engineering a sensory experience. From the rainbow nonpareil sprinkles to the crack-free, high-gloss finish, every detail is designed to impress.
Whether you are preparing for a milestone celebration or just want to master the art of the dip, this guide covers the culinary forensics of the perfect pop. We will dive deep into the science of moisture ratios and temperature control to ensure your treats look exactly like the ones in the photos.
Why These Vibrant Pink Treats Stand Out
- Perfectly Moist Interior: We use a specific crumb-to-frosting ratio to ensure a dense, fudgy, vibrant pink vanilla center that melts in your mouth.
- High-Gloss Candy Shell: By adding a secret thinning agent, we achieve a pastel pink coating that is smooth, reflective, and completely crack-free.
- Visual Precision: Every element, from the white lollipop sticks to the colorful nonpareils, is balanced for a minimalist yet celebratory aesthetic.
- Scientifically Tested: We have optimized the chilling times to prevent the common “sliding pop” syndrome, ensuring your cake stays firmly on the stick.
Essential Elements for the Vibrant Pink Center
To achieve the signature look of our Birthday Cake Pops, you need high-quality ingredients that provide both structure and color. This isn’t the time for generic substitutes if you want that neon-vibrant interior.
Cake Flour (2 ½ cups / 310g): Cake flour has a lower protein content than all-purpose flour. This results in a finer, tighter crumb that crumbles beautifully without becoming “bready.”
Granulated Sugar (1 ½ cups / 300g): Sugar provides sweetness, but it also aids in moisture retention. This ensures the center remains dense and fudgy rather than dry and sandy.
Unsalted Butter (1 cup / 225g): Softened butter is creamed with sugar to aerate the batter. This creates the foundational structure that will later be crumbled and reconstituted.
Pink Gel Food Coloring: Liquid coloring can throw off the chemistry of the batter. Use a high-quality gel to achieve that “vibrant pink” center seen in the visual blueprint without thinning the mix.
Vanilla Bean Paste (2 tsp / 10ml): For an authentic “birthday cake” flavor, paste is superior to extract. It provides those beautiful tiny black flecks and a deep, floral aroma.
Whole Milk (1 cup / 240ml): The fat in whole milk contributes to the richness of the vanilla cake. It helps create a tender crumb that holds its shape when rolled into spheres.
Baking Powder (2 ½ tsp / 12g): This is our “invisible” foundational ingredient. It provides the necessary lift during the initial bake, ensuring the cake isn’t too heavy before we crumble it.
The Secrets to a Glossy Pastel Pink Shell
The exterior of the Birthday Cake Pops requires a different set of ingredients focused on flow and finish. To get that handheld smartphone-photo-worthy shine, you must manage the viscosity of your coating.
Pastel Pink Candy Melts (16 oz / 450g): These are formulated to melt smoothly and harden quickly. They provide the opaque, pastel color that defines this specific aesthetic.
Paramount Crystals or Coconut Oil (2 tbsp / 30g): This is the secret to the “glossy, crack-free” shell. It thins the candy melts to a dipping consistency, allowing excess to flow off easily and leaving a thin, professional layer.
Rainbow Nonpareil Sprinkles: These tiny, colorful spheres add the perfect textural contrast. They must be applied while the shell is still wet to ensure they “sink” slightly into the coating for a seamless look.
White Lollipop Sticks (6-inch): Sturdy paper or plastic sticks provide the classic look. They must be clean and white to contrast against the pastel pink shell.
Professional Tools for Cake Pop Success
You don’t need a bakery, but a few specific tools will help you achieve the “gourmet” finish. A white ceramic stand is not just for display; it allows the pops to dry upright without flat spots.
A small cookie scoop (1 tbsp capacity) ensures every Birthday Cake Pops sphere is identical in size. Uniformity is the hallmark of a professional-grade dessert.
Finally, a deep, narrow microwave-safe bowl is essential for dipping. A deeper pool of candy coating allows for a single, smooth motion, which is the key to a “crack-free” surface.
Step-By-Step Engineering of the Perfect Pop
Baking the Vibrant Pink Foundation
Preheat your oven to 350°F (175°C). Cream the butter and sugar until pale and fluffy—usually about 3-5 minutes. Add the eggs one at a time, followed by the vanilla bean paste and a generous amount of pink gel coloring.
Alternate adding the dry ingredients and the milk, starting and ending with the flour. Pour into a parchment-lined 9×13 pan. Bake for 25-30 minutes, or until a toothpick comes out clean. The cake should be a stunning, vibrant pink throughout.
The Art of the Crumb and Bind
Once the cake is completely cool, trim off any browned edges. You want only the soft, pink interior. Crumble the cake into a large bowl until it looks like fine sand. No large chunks should remain.
Add 1/2 cup (120g) of vanilla frosting. Mix with your hands until the dough reaches the consistency of playdough. It should be moist enough to hold a ball shape without cracking, but not so wet that it feels greasy.
Rolling and Chilling for Stability
Scoop 1-tablespoon portions and roll them between your palms until they are perfectly spherical. Place them on a tray and chill in the freezer for exactly 15 minutes. You want them firm, but not frozen.
Melting the candy coating is a delicate process. Heat the pink candy melts and coconut oil in 30-second intervals, stirring vigorously between each. The result should be a glossy, liquid “lava” consistency.
The Master Dip Technique
Dip the tip of a lollipop stick into the melted candy, then insert it halfway into a chilled cake ball. This acts as “glue.” Let it set for 2 minutes before dipping the entire pop.
Submerge the pop vertically until the coating reaches the stick. Lift it out, then gently tap your wrist—not the stick—to let the excess drip off. While the shell is still wet, scatter the rainbow nonpareils across the top. Place the stick into your ceramic stand to dry.
Expert Tips for a Crack-Free Finish
- Avoid Temperature Shock: If your cake balls are too cold and your candy coating is too hot, the shell will expand and crack. Let the cake balls sit at room temperature for 5 minutes after the freezer before dipping.
- The “Tap” Method: Never shake the pop. Gentle tapping on your wrist ensures the coating stays smooth and doesn’t develop air bubbles.
- Thinning is Winning: If the coating feels thick or “gloppy,” add a teaspoon more of coconut oil. It should flow off a spoon in a steady, thin ribbon.
- Clean Sticks: If candy drips down the stick, wipe it immediately with a damp paper towel to maintain that “minimalist” look.
Maximizing Freshness and Storage
Birthday Cake Pops are incredibly resilient thanks to their candy seal. They can be stored in an airtight container at room temperature for up to 3 days. For longer storage, keep them in the refrigerator for up to a week.
If you are making these ahead of time, do not freeze the finished pops, as the moisture can cause the candy shell to “sweat” upon thawing. Instead, freeze the rolled cake balls (without sticks) for up to 3 months, then thaw and dip when ready.
Creative Pairings and Serving Suggestions
These pops are a showstopper on their own, but they also play well with other desserts. If you are hosting a large party, consider serving them alongside a Funfetti Loaf Cake (coming soon) for a variety of textures.
For a sophisticated dessert table, pair the sweetness of the pink vanilla with a more decadent Birthday Cake Cheesecake. If you need a savory break between the sugar rushes, these pops are surprisingly great after a light Greek Salad.
If you’re looking for more whimsical treats, check out our guide on Cinnamon Roll Cake or even a fun Pancake-themed brunch.
Frequently Asked Questions
Yes! You can store finished pops at room temperature for 3 days or in the fridge for up to a week. For best results, don’t freeze the finished pops as the shell may lose its gloss when thawing.
The secret is thinning the candy melts with coconut oil or paramount crystals. This reduces the viscosity, allowing the excess to flow off smoothly, leaving a thin, reflective, and professional-looking layer.
You want a ‘playdough’ consistency. Start with a small amount of frosting and add more gradually. If the mixture is too wet, the pops will be greasy; if too dry, they will crumble and fall off the stick.
This happens if the cake balls are too heavy, too warm, or if you didn’t ‘glue’ them. Always dip the stick in melted candy before inserting it into the cake ball, and ensure the ball is chilled and firm.
Cracking is usually caused by temperature shock. If the cake balls are too cold and the candy coating is too warm, the center expands and cracks the shell. Let chilled cake balls sit at room temperature for 5 minutes before dipping.
The Definitive Birthday Cake Pops Recipe
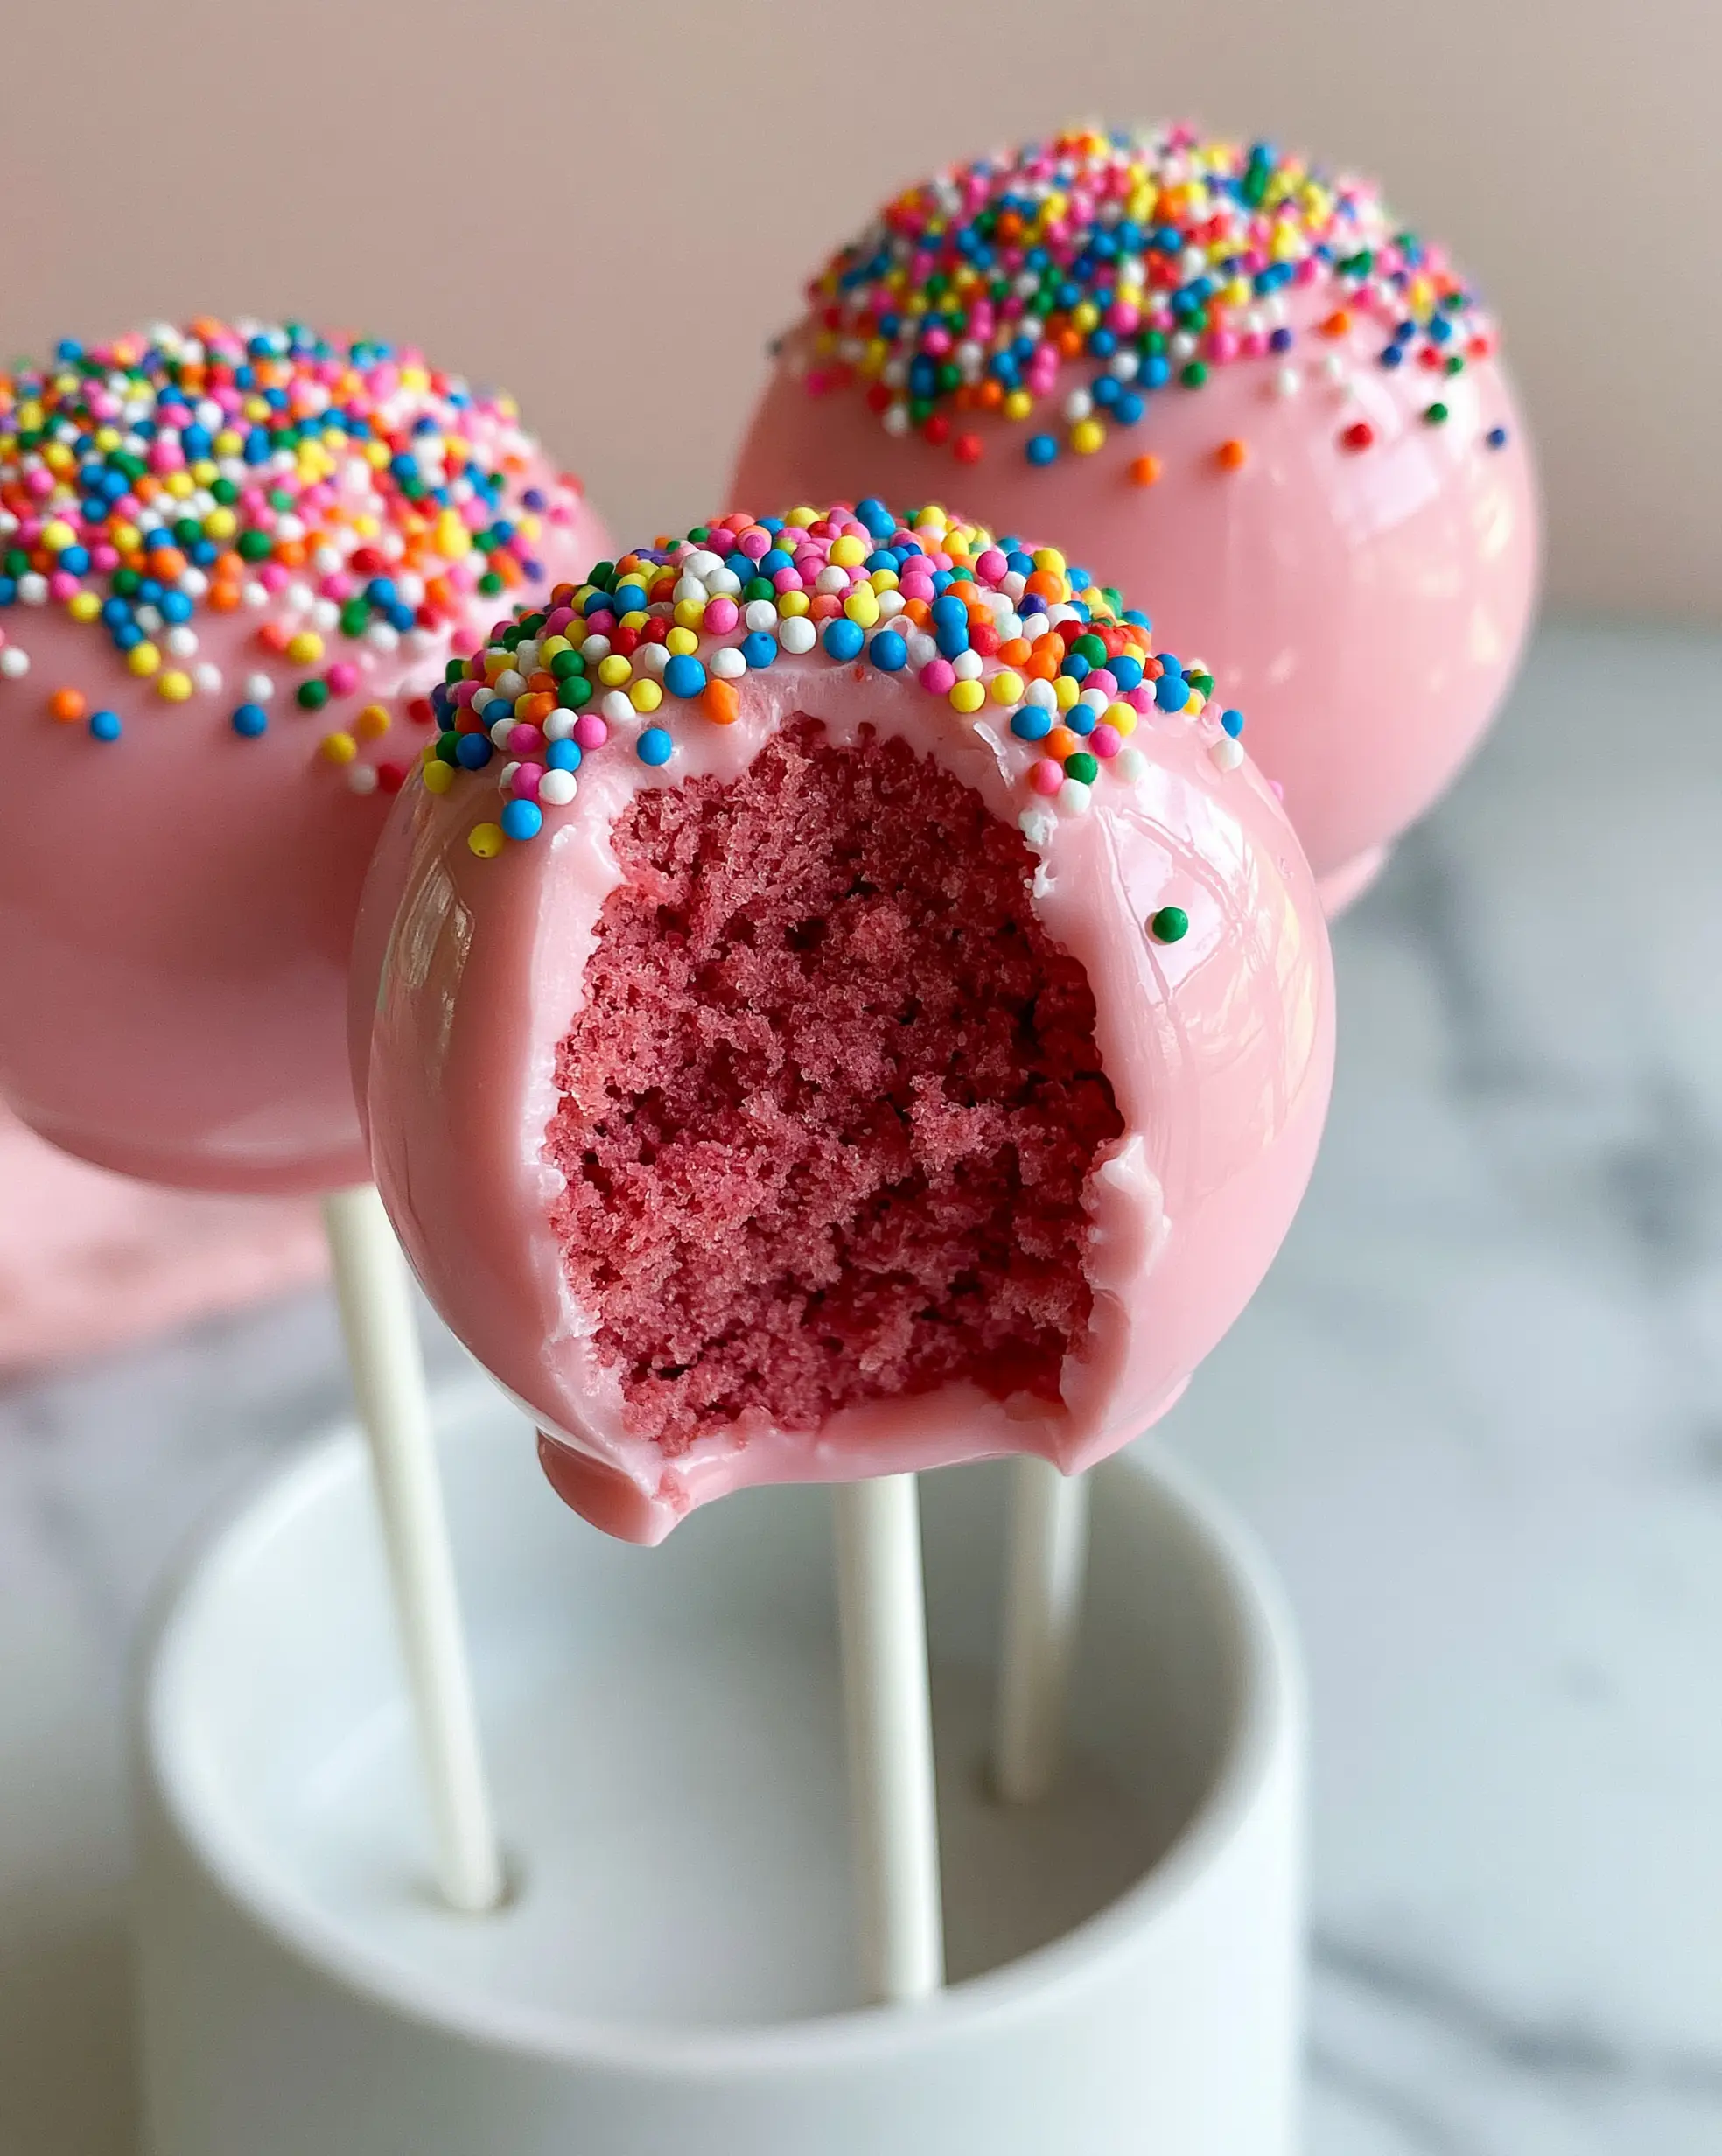
Birthday Cake Pops: The Ultimate Recipe for Glossy Pink Perfection
Ingredients
Equipment
Method
- Cream softened butter and sugar for 5 minutes until light and airy. Add eggs and pink gel coloring until a vibrant pink hue is achieved.
- Alternate adding cake flour and milk. Bake in a 9x13 pan at 350°F (175°C) for 30 minutes. Cool completely.
- Remove browned edges of the cake and crumble the pink interior into fine crumbs. Mix with vanilla frosting until a dough forms.
- Roll into 1-tablespoon spheres. Chill on a tray in the freezer for 15 minutes to firm up.
- Melt candy wafers with coconut oil in the microwave in 30-second bursts until glossy and smooth.
- Dip the stick in candy, insert into the ball, then submerge the entire ball. Tap off excess, top with rainbow nonpareils, and set in a stand.
Notes
Thin the candy coating with coconut oil until it reaches a 'heavy cream' consistency for the smoothest finish.
Join the Authentic Flavor Community!
We hope these Birthday Cake Pops bring a burst of vibrant pink joy to your next celebration! There is nothing quite like the satisfaction of a perfectly smooth, glossy finish. If you make these, please leave a comment below and let us know how your “master dip” went!
Don’t forget to follow us on Pinterest for more visually stunning recipes. Pin this to your “Party Desserts” board so you never lose the secret to the perfect crack-free shell!