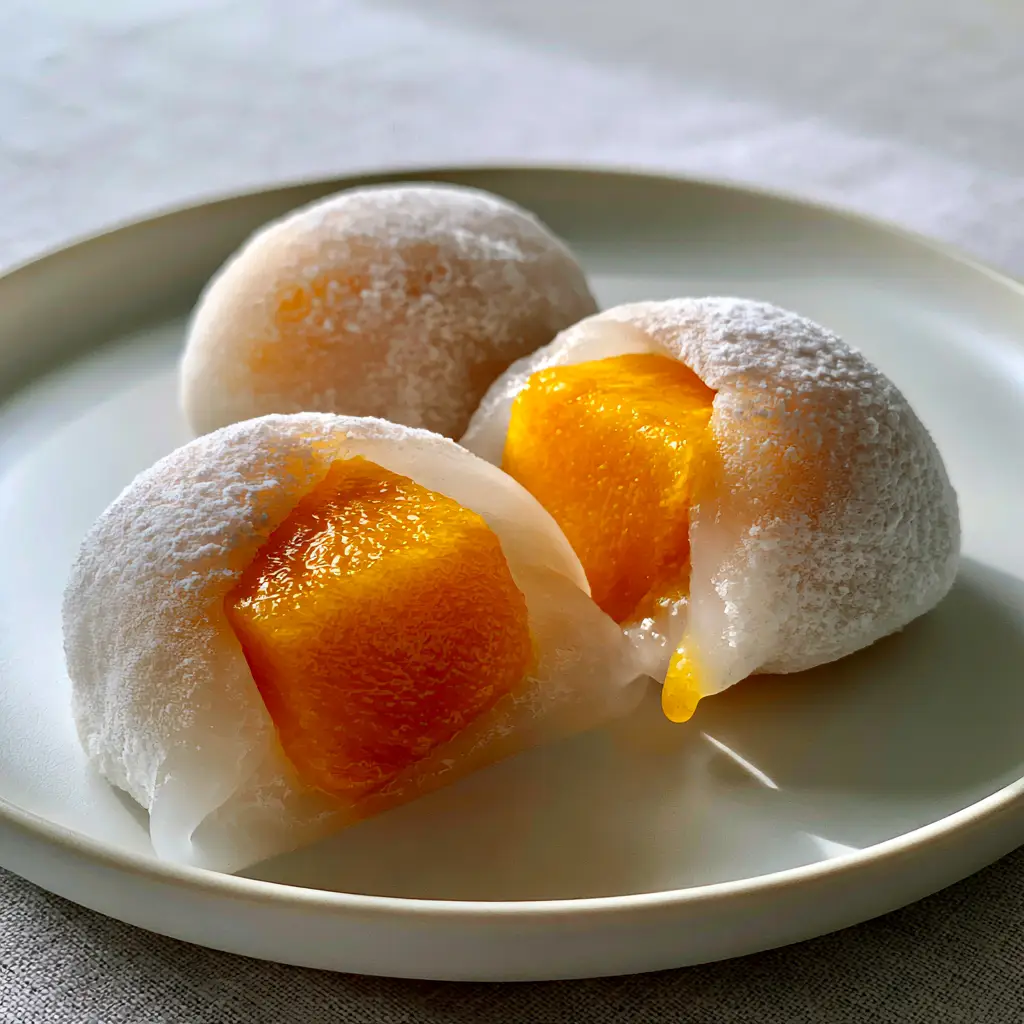
There is a specific, ethereal joy in biting into a perfectly crafted mango mochi. It begins with the delicate resistance of a milky-white, translucent skin that gives way to a burst of vibrant, sun-ripened fruit. This isn’t just a dessert; it is a masterclass in contrasting textures—the “Q-texture” bounce of glutinous rice paired with the velvet silkiness of a neon-orange mango cube.
Achieving this level of culinary perfection at home requires more than just a recipe; it requires an understanding of the science behind the starch. Whether you are a seasoned wagashi enthusiast or a curious home cook, this guide will walk you through the precise steps to create mochi that looks like it was plucked from a high-end Tokyo boutique.
In this guide, we will explore the nuances of steaming the dough to achieve that signature supple state. We will also dive into the visual cues that indicate your mango is at its peak ripeness, ensuring every bite is a glistening, juice-filled revelation.
The Irresistible Appeal of Homemade Mango Delights
What makes this mango mochi stand out from store-bought versions is the uncompromising freshness of the ingredients and the lack of preservatives. Here is what you can expect from this professional-grade recipe:
- The Perfect “Q-Texture”: A term used in Asian cuisine to describe the ideal bouncy, elastic, and chewy mouthfeel that isn’t sticky to the teeth.
- Vibrant Neon-Orange Centers: By using specific mango varieties, we ensure a visual “pop” that contrasts beautifully with the white dough.
- Handheld Elegance: Each round, plump ball is delicately dusted with silk-textured starch, making them as beautiful to look at as they are to eat.
- Natural Morning Light Quality: The translucency of the dough allows light to pass through, giving the mochi an almost glowing, ethereal appearance on the plate.
The Architecture of Supple Mochi: Essential Ingredients
To create a mango mochi that remains soft even after chilling, you must balance your ratios of starch to moisture. Each ingredient serves a structural purpose in this delicate equation.
Glutinous Rice Flour (Mochiko or Shiratamako): 1.5 cups (200g). This is the structural backbone of the mochi, providing the necessary elasticity and that signature translucent, milky-white finish.
Granulated Sugar: 1/4 cup (50g). Sugar does more than sweeten; it acts as a tenderizer, interfering with the starch molecules to keep the dough soft and supple for longer periods.
Filtered Water or Coconut Milk: 1 cup (240ml). Water provides the hydration needed to gelatinize the starch, while coconut milk can add a subtle tropical depth that complements the mango.
Fresh Sun-Ripened Mangoes: 2 large (approx. 400g). Look for Ataulfo or Honey mangoes for that intense neon-orange color and a fiber-free, juicy interior that glistens when sliced.
Cornstarch or Potato Starch (Katakuriko): 1/2 cup (60g). This is used for the fine dusting, preventing the mochi from sticking to your hands while adding a matte, sophisticated finish.
Neutral Oil: 1 tsp (5ml). A tiny amount of oil worked into the dough adds a professional sheen and prevents the mochi from becoming brittle in the refrigerator.
Precision Tools for Mochi Mastery
While mango mochi is a rustic tradition, using the right equipment ensures a consistent, professional result every time. You don’t need expensive machinery, but precision is key.
A high-quality steamer (bamboo or metal) is essential for cooking the dough evenly without introducing too much direct moisture. If you prefer a modern shortcut, a microwave-safe glass bowl and plastic wrap can also work, though steaming yields the most translucent results.
You will also need a silicone spatula for stirring the incredibly sticky dough and a fine-mesh sieve to ensure your dusting starch is as light as silk. A sharp, non-serrated knife is crucial for achieving that clean cut that reveals the droplet of glistening juice on the mango edge.
The Secret to Kneading the Most Supple Dough
The journey to the perfect mango mochi begins with the preparation of the glutinous rice dough. This process is about heat control and mechanical action.
Mixing and Steaming for Translucency
Whisk your glutinous rice flour and sugar together in a heat-proof bowl. Slowly pour in your liquid, whisking constantly to ensure no dry lumps remain. The mixture should have the consistency of heavy cream.
Place the bowl in your steamer over boiling water. Cover and steam for 15-20 minutes. You are looking for a specific visual change: the opaque white liquid must transform into a translucent, semi-clear, and incredibly sticky solid mass.
The Kneading Process
While the dough is hot, add the neutral oil. Use your spatula to fold and “knead” the dough within the bowl. This mechanical action develops the “Q-texture.” As you work it, the dough will become smoother, more elastic, and take on a subtle bounce.
Crafting the Signature Fruit Core
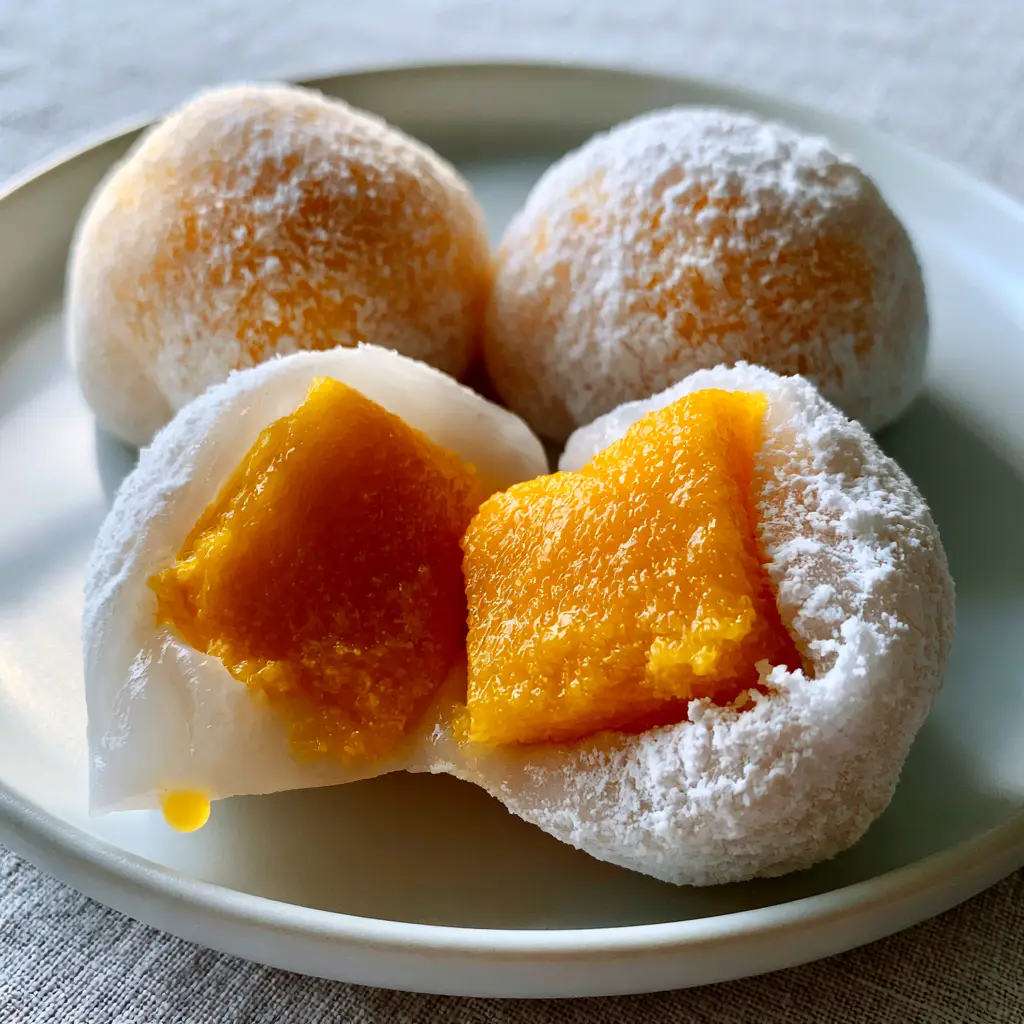
The heart of your mango mochi is the fruit itself. To mimic the visual blueprint of a “large, juicy cube of vibrant neon-orange,” you must select mangoes that are fully ripe but still firm enough to hold their shape.
Peel the mango carefully and cut the cheeks away from the pit. Carve the flesh into uniform 1-inch (2.5cm) cubes. Avoid using the stringy parts near the pit. Pat the cubes gently with a paper towel; if the fruit is too wet, the dough won’t adhere, but don’t dry it out so much that you lose that glistening juice droplet effect.
If you enjoy experimenting with fruit-filled rice cakes, you might also find inspiration in our strawberry mochi recipe or even a refreshing watermelon mochi during the summer months.
Assembly: Wrapping Like a Professional
This is where the mango mochi takes its final, plump, round shape. Prepare a clean workspace heavily dusted with your fine white cornstarch.
Transfer the warm dough to the starch-covered surface. Dust the top of the dough as well. Divide the dough into equal portions (about 35g-40g each). Flatten a piece of dough into a disc, making the edges slightly thinner than the center.
Place a mango cube in the center. Gently pull the edges of the dough up and over the mango, pinching the bottom to seal. The dough should be soft and stretchy, allowing you to mold it into a smooth, round ball without tearing. Roll the finished ball lightly in more starch to achieve that silk-textured finish.
Pro-Tips for Handling Sticky Glutinous Rice
- Temperature Control: Work with the dough while it is still warm. Once it cools completely, it loses its stretchiness, making it difficult to seal around the mango.
- Starch is Your Friend: Do not be afraid to use plenty of cornstarch on your hands and work surface. You can always brush off the excess later with a pastry brush.
- The “Snap” Test: If the dough snaps when you pull it, it needs more moisture or kneading. It should stretch significantly before breaking.
- Uniformity: Use a small kitchen scale to weigh your dough portions. This ensures your three plump balls look identical on the plate.
Preserving the Suppleness: Storage and Serving
Mango mochi is best enjoyed the day it is made. At room temperature, the “Q-texture” is at its absolute peak. However, the fresh fruit filling means these treats must be handled with care.
To store, place them in an airtight container. If you must refrigerate them, keep them in the warmest part of the fridge for no more than 24 hours. Cold temperatures eventually cause the starch to undergo retrogradation, making the skin tough. Before serving, let them sit at room temperature for 15 minutes to regain their supple state.
Pairing Your Mango Delights
While these mochi are a standout on their own, they fit perfectly into a larger tropical spread. For a light lunch before dessert, consider a street corn chicken salad or a refreshing cucumber salad.
If you are looking for more fruit-forward inspirations, our mango dessert recipe (coming soon) collection offers plenty of variety. For those who prefer a savory contrast to the sweet mochi, serving these alongside chipotle shrimp tostadas creates a beautiful balance of heat and sweet.
Expert Troubleshooting: Frequently Asked Questions
While possible, fresh mango is highly recommended to achieve the vibrant neon-orange color and the glistening juice droplet effect described in the visual blueprint.
It is best stored in an airtight container at room temperature for the first day. Refrigeration is necessary for safety but will eventually cause the skin to harden.
Translucency is achieved by fully steaming the dough until the opaque white liquid turns into a semi-clear solid mass, indicating the starch has gelatinized.
Q-texture is a term used to describe the perfect culinary balance of chewiness, elasticity, and bounce found in high-quality glutinous rice desserts.
Mochi dough is naturally very sticky. Ensure you use a generous amount of cooked cornstarch or potato starch on your hands and work surface to manage it.
The Ultimate Mango Mochi Recipe

Mango Mochi: The Ultimate Recipe for Soft, Chewy, and Juicy Tropical Bliss
Ingredients
Equipment
Method
- Whisk glutinous rice flour, sugar, and water in a heat-proof bowl until smooth and no lumps remain.
- Place the bowl in a steamer and steam for 20 minutes until the dough becomes translucent and milky-white.
- While hot, fold in the neutral oil with a spatula and knead until the dough is stretchy and supple.
- Cut mango into 1-inch cubes. Pat dry gently to ensure the surface is moist but not dripping.
- Divide dough into 8 pieces. Flatten each into a disc, place mango in center, and pinch edges to seal into a round ball.
- Roll each ball in a fine dusting of white cornstarch to achieve a matte, silk-textured finish.
Notes
Use Ataulfo mangoes for the most vibrant orange interior.
Conclusion: Bring the Taste of the Tropics Home
The journey to creating the perfect mango mochi is a rewarding blend of culinary science and artistic expression. By focusing on the translucency of the dough and the vibrancy of the fruit, you create a dessert that is a feast for the eyes and the palate. The contrast of the silk-textured dusting against the juicy neon-orange center is a hallmark of high-quality homemade mochi.
We invite you to share your results with us! Did your mochi achieve that perfect subtle bounce? Head over to our Pinterest to see more visual guides and pin this recipe for your next weekend project. Leave a comment below and let us know your favorite mango variety for this recipe!