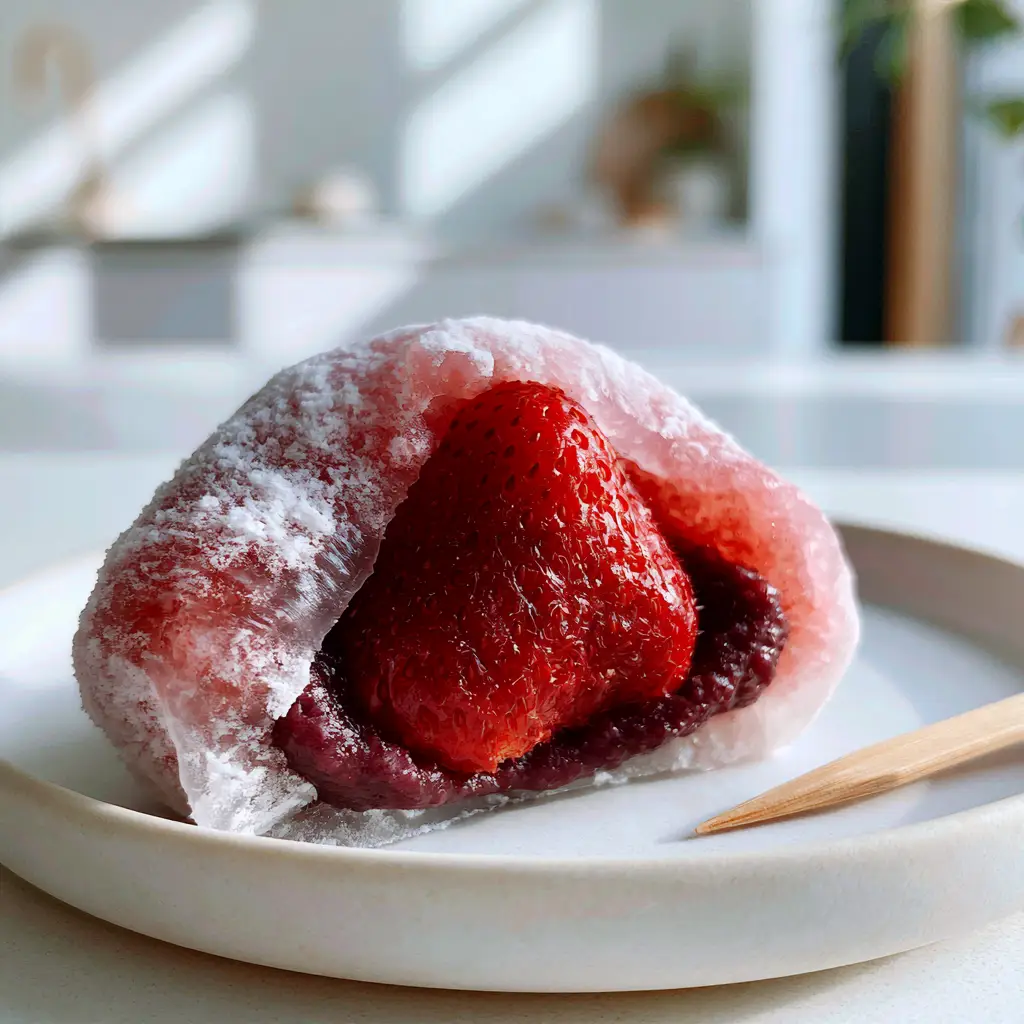
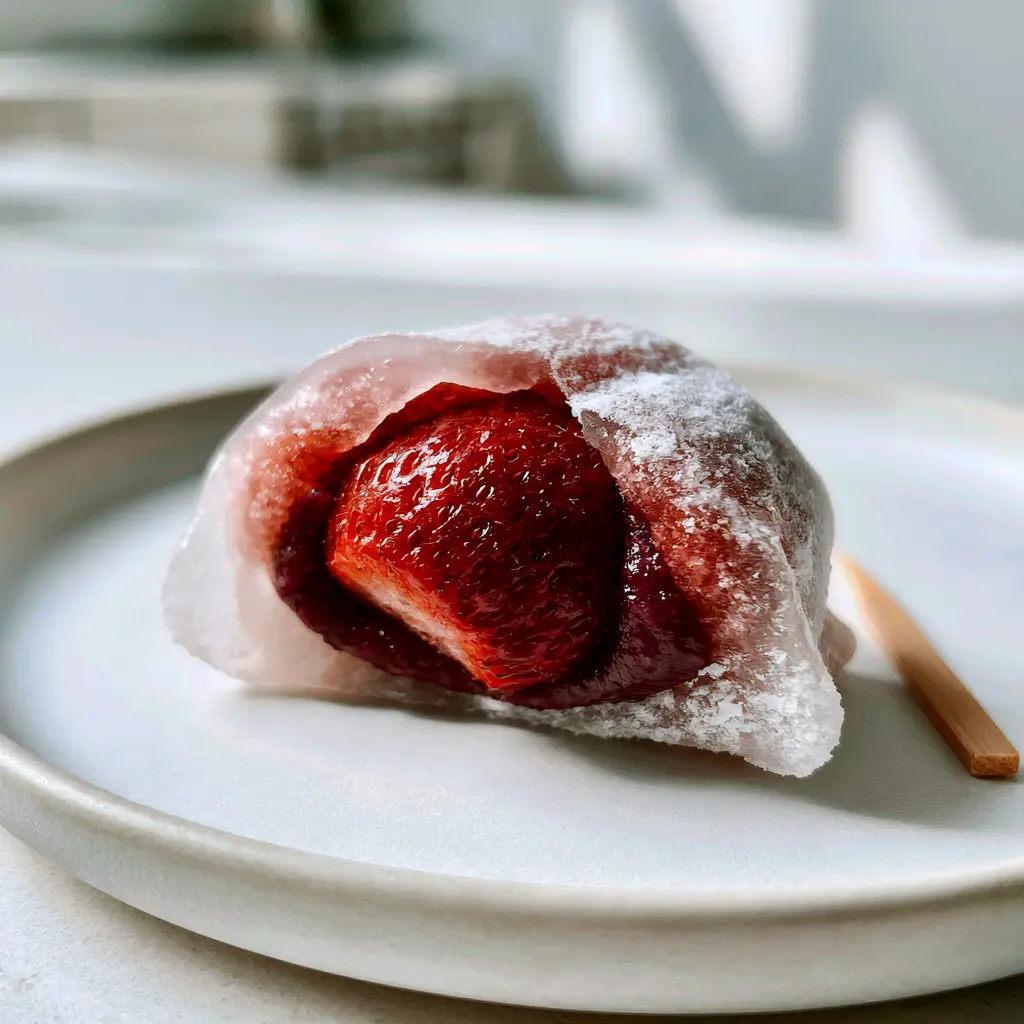
There is nothing quite as visually captivating as a perfectly crafted Strawberry Mochi, also known as Ichigo Daifuku. This Japanese delicacy features a vibrant, juicy whole strawberry encased in a velvety layer of sweet red bean paste and wrapped in a translucent, baby-pink glutinous rice dough.
When you slice into this dessert, the macro cross-section reveals a stunning contrast of deep reds and soft pinks that look almost too beautiful to eat. In this guide, we will master the art of achieving that signature pillowy texture and the delicate whisper-thin dusting of cornstarch seen in high-end Tokyo confectioneries.
Whether you are a seasoned wagashi enthusiast or a curious home cook, this recipe provides the scientific precision needed for elastic, non-sticky dough every single time. Get ready to elevate your dessert game with a treat that balances sweetness, acidity, and a unique chewy texture.
Why This Pink Ichigo Daifuku Is the Perfect Confection
- Visual Masterpiece: The translucent pink dough provides a modern, elegant twist on the traditional white mochi, perfectly complementing the fruit within.
- Textural Harmony: Experience the “mochi-mochi” sensation—a specific Japanese term for a texture that is simultaneously soft, elastic, and pillowy.
- Flavor Balance: The natural tartness of the whole fresh red strawberry cuts through the rich, earthy sweetness of the smooth dark red bean paste.
- Professional Finish: We use an ultra-fine dusting technique to ensure a matte, sophisticated look on your minimalist white ceramic plate.
Foundational Ingredients for the Perfect Strawberry Mochi
Fresh Whole Strawberries: Choose medium-sized, deep-red berries that are firm to the touch. The strawberry is the heart of the dish, providing the essential structural core and a burst of juice.
Smooth Dark Red Bean Paste (Koshian): This fine-textured paste creates a seamless barrier between the fruit and the dough. Its dark maroon hue is vital for that iconic cross-section visual.
Shiratamako (Glutinous Rice Flour): 1 cup (120g). This specific type of flour is processed into coarse granules, which is the secret to a more refined, translucent, and elastic dough compared to standard mochiko.
Granulated Sugar: 1/4 cup (50g). Sugar is not just for sweetness; it acts as a softener that keeps the glutinous rice starch from recrystallizing and becoming hard.
Water and Pink Food Coloring: 3/4 cup (180ml) water. A single drop of beet juice or gel coloring transforms the dough into that characteristic “baby-pink” aesthetic described in our blueprint.
Cornstarch (or Potato Starch): 1/2 cup (65g). This is the “invisible” workhorse used for dusting to prevent the elastic dough from sticking to your hands or the plate.
Essential Equipment for Mochi Mastery
To achieve a professional result, you will need a steamer basket (bamboo or metal) to cook the dough evenly without drying it out. A silicone spatula is highly recommended for folding the sticky dough, as it provides the necessary leverage without snagging.
Finally, ensure you have a sharp non-serrated knife for the final cut. Wiping the blade with a damp cloth between slices is the only way to get that clean, macro-level cross-section of the strawberry and paste.
Step-by-Step Instructions for Hand-Crafted Daifuku
Preparing the Strawberry Core
Wash your strawberries and carefully remove the green leafy hull without cutting too deep into the fruit. Pat them completely dry with a paper towel; any residual moisture will prevent the red bean paste from adhering properly.
Divide your smooth dark red bean paste into equal portions, roughly 20g each. Flatten a ball of paste in your palm and wrap it around the strawberry, leaving the very tip of the berry exposed to help you orient the fruit later.
Steaming the Translucent Pink Dough
In a heat-proof bowl, whisk together the Shiratamako, sugar, and the pink-tinted water until no lumps remain. Place the bowl in a steamer over boiling water, cover with a cloth (to catch condensation), and steam for 15 minutes.
Halfway through, use your silicone spatula to fold the dough from the edges toward the center. You will know it is ready when the dough transitions from an opaque pale pink to a vibrant, translucent, and glossy pink hue.
Shaping and Dusting with Precision
Generously dust your work surface with the ultra-fine cornstarch. Turn the hot, elastic dough onto the starch and coat your hands thoroughly to prevent sticking.
Divide the dough into circles. Place one bean-wrapped strawberry in the center (tip down) and gently stretch the pink dough over the base, pinching it at the bottom to seal. The dough should look soft and pillowy, not wet.
Expert Tips for Success
- Temperature Control: Work with the dough while it is still warm; once it cools completely, it loses the elasticity required to stretch thin without tearing.
- The “Whisper” Dust: Use a fine-mesh sieve to apply the cornstarch dusting. This ensures the “whisper-thin layer” described in the visual prompt rather than a chalky buildup.
- Berry Selection: Avoid oversized strawberries, as they make the mochi difficult to wrap and can result in an uneven dough-to-filling ratio.
- Moisture Management: If the dough feels too sticky, do not add more flour to the mix—instead, increase the dusting starch on your hands.
Storage and Freshness Guidelines
Strawberry Mochi is best enjoyed the day it is made to appreciate the juicy snap of the fresh fruit. If you must store them, place them in an airtight container at room temperature for up to 24 hours.
Do not refrigerate these treats, as the cold temperature causes the glutinous rice starch to undergo retrogradation, making the dough tough and opaque. For a different fruit experience, you might enjoy our tropical mango mochi or a refreshing watermelon variety.
What to Serve With This Elegant Dessert
This dessert is traditionally served with hot Matcha or toasted Hojicha tea to balance the sweetness. The minimalist presentation on a matte white ceramic plate makes it a perfect finale for a Japanese-themed dinner.
If you are planning a full menu, consider starting with a light crisp cucumber salad or a savory zucchini and chickpea skillet. For those who prefer a hearty main before their sweets, our honey garlic beef bowl provides a savory contrast to the delicate mochi.
Frequently Asked Questions
Yes, you can microwave the mixture in 30-60 second intervals, stirring in between, until it becomes translucent. However, steaming provides more consistent moisture for a softer result.
Yes, but the texture will be slightly different. Shiratamako produces a more elastic, translucent dough, while Mochiko results in a dough that is more doughy and opaque.
Add a very small drop of pink gel food coloring or beet juice to the water before mixing it with the flour to ensure the color is evenly distributed and not streaky.
It is best eaten within 24 hours. The fresh strawberry releases moisture over time, which can make the inner bean paste watery and the dough soggy if left too long.
Mochi dough is naturally very sticky. Ensure you use enough cornstarch on your hands and work surface. Also, ensure the dough is fully cooked; undercooked dough is significantly stickier.
Mastering the Strawberry Mochi Recipe
Strawberry Mochi: The Ultimate Pink Ichigo Daifuku Recipe
Ingredients
Equipment
Method
- Wash strawberries and remove hulls; pat completely dry with paper towels.
- Encase each strawberry in a thin, even layer of red bean paste, leaving the top tip visible.
- Whisk rice flour, sugar, water, and coloring in a bowl until smooth.
- Steam for 15 minutes, stirring halfway through, until the dough is translucent and elastic.
- Place dough on a cornstarch-dusted surface and divide into 6 portions.
- Stretch pink dough over the bean-wrapped berries and pinch at the bottom to seal.
Notes
Never refrigerate mochi as it will become hard and lose its translucency.

Bring the Flavors of Japan to Your Kitchen
Making Strawberry Mochi is a meditative and rewarding process that results in one of the world’s most beautiful desserts. By following these steps, you’ve mastered the delicate balance of texture and flavor that defines high-quality wagashi.
If you enjoyed this recipe, please leave a comment below and share your results! Don’t forget to save this to your dessert boards on Pinterest for your next special occasion. Happy cooking!