There is a specific kind of culinary magic that happens when a perfectly golden-brown, panko-encrusted chicken breast meets a silky, emulsified lemon butter sauce. The Chicken Christopher is not just another poultry recipe; it is a masterclass in texture and balance that rivals the most expensive bistro menus.
If you have ever craved a dish that combines a shattering crunch with a bright, citrusy finish, this is your definitive guide. We are stripping away the complexity to show you how to achieve that professional, high-gloss sheen and deep amber highlights right in your own kitchen.
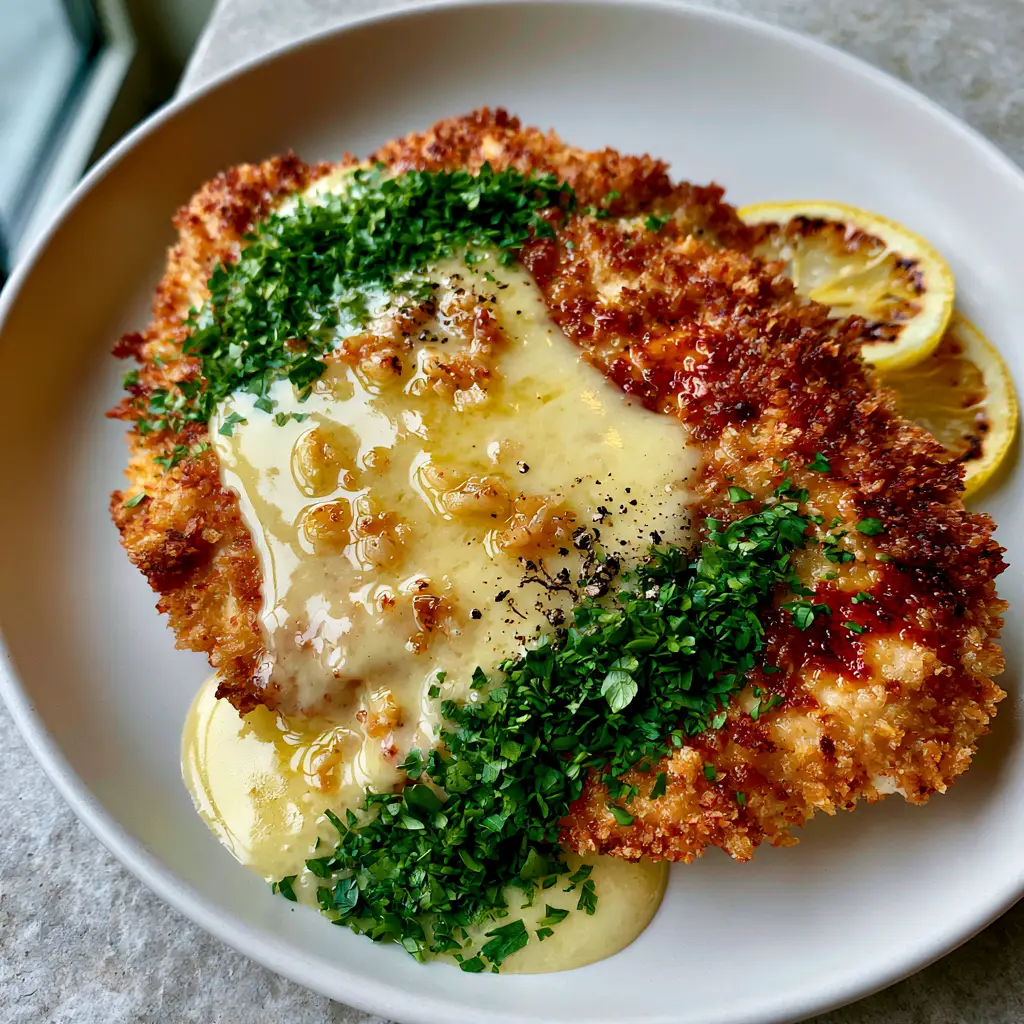
Inspired by classic American-Italian steakhouse traditions, our version focuses on a macro-level attention to detail. From the precisely minced sautéed garlic to the charred lemon wheels, every element on the plate serves a functional and aesthetic purpose.
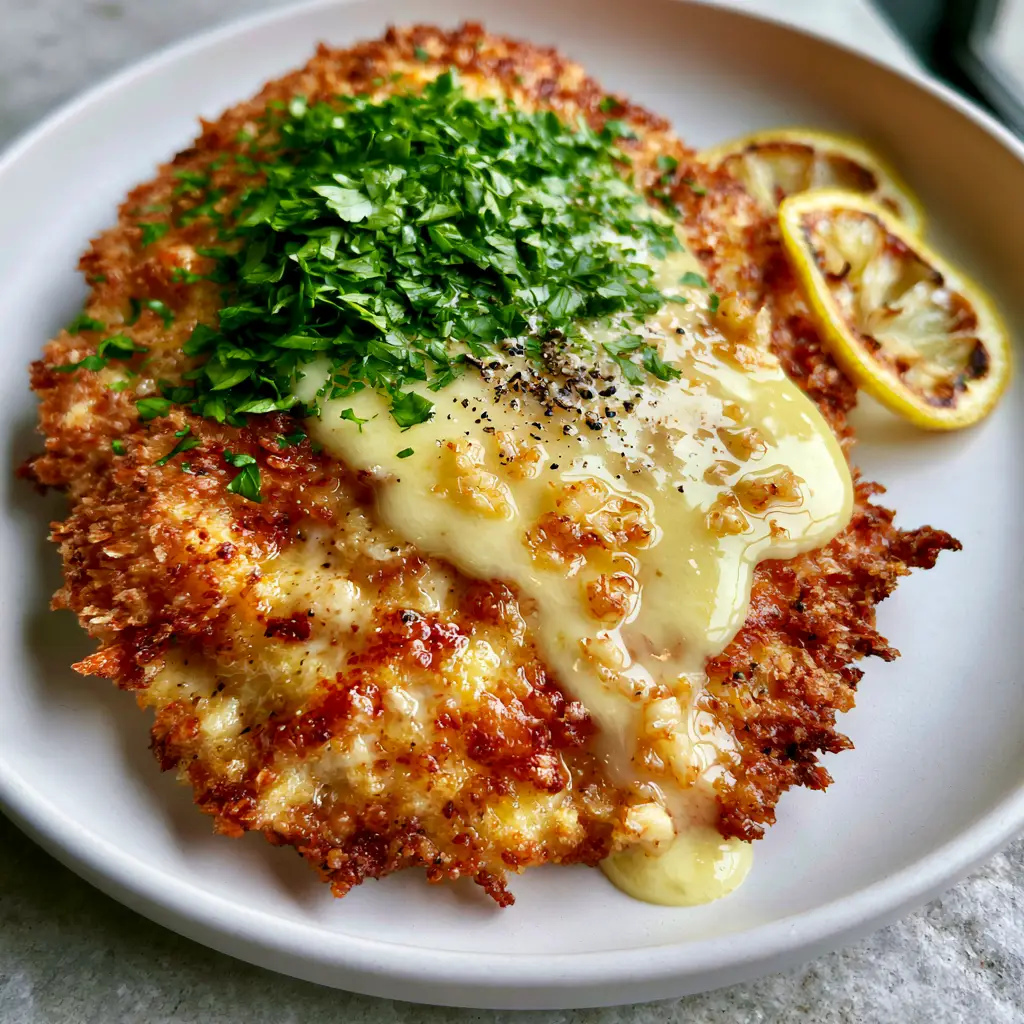
The Irresistible Appeal of This Pan-Seared Masterpiece
- Shatter-Crisp Texture: By utilizing a specific breading technique, we ensure the panko stays airy and light while achieving a deep, golden-brown hue.
- The “Liquid Gold” Sauce: A thick, silky lemon garlic butter sauce that clings to the chicken without making the breading soggy.
- Aromatic Depth: The heavy dusting of freshly chopped flat-leaf parsley and cracked black pepper provides a punchy, herbaceous counterpoint to the rich butter.
- Restaurant-Style Presentation: We teach you the secret to those perfectly charred lemon slices that add a sophisticated smoky acidity to the final bite.
Essential Components for the Perfect Chicken Christopher
Boneless Skinless Chicken Breasts: To achieve that uniform, pan-seared finish, we recommend pounding the breasts to an even 1/2-inch (1.25cm) thickness. This ensures the chicken cooks through at the exact moment the breading hits its peak amber color.
Panko Breadcrumbs: Unlike traditional breadcrumbs, 2 cups (120g) of panko provide the jagged, “crispy” surface area seen in our visual blueprint. This texture is essential for catching and holding the glossy lemon sauce.
High-Quality Unsalted Butter: You will need 1/2 cup (115g) of cold butter to create the emulsion. Using cold butter allows it to melt slowly into the lemon juice and stock, creating a thick, stable sauce rather than a broken oily mess.
Fresh Garlic: We use 4 large cloves, finely minced. Sautéing these until they are just golden ensures a mellow, nutty sweetness that permeates the sauce without the harsh bite of raw garlic.
Lemons: You will need two lemons; one for the 3 tbsp (45ml) of fresh juice and another to cut into thin wheels for charring. The charred citrus oils provide a depth that bottled juice simply cannot replicate.
All-Purpose Flour and Eggs: 1/2 cup (60g) of flour and 2 large eggs create the “glue” that keeps your breading attached to the meat during the high-heat searing process.
Foundational Invisible Ingredients: Do not overlook 2 tbsp (30ml) of high-smoke point oil (like avocado or grapeseed oil) for the sear, and a generous pinch of Kosher salt to season every layer of the dish.
The Tools Required for Culinary Success
Achieving this level of visual perfection requires the right equipment. A large 12-inch (30cm) stainless steel or cast-iron skillet is non-negotiable for getting that deep, even browning on the chicken.
You will also need three shallow bowls for your dredging station. A wire cooling rack set over a baking sheet is a professional secret; resting the fried chicken on a rack instead of a paper towel prevents steam from softening the bottom crust.
Finally, a high-quality whisk is essential for the sauce. The mechanical action of whisking cold butter into hot liquid is what creates the “silky” texture described in our Midjourney prompt.
The Blueprint for a Flawless Golden-Brown Crust
Step 1: The Triple-Dredge Protocol
Set up your station with three bowls: flour seasoned with salt, beaten eggs, and the panko breadcrumbs. Pat your chicken breasts bone-dry with paper towels to ensure the flour adheres perfectly.
Dredge the chicken in flour, dip into the egg wash, and then press firmly into the panko. You want to see “visible panko textures” with no bald spots, as this creates the foundation for the deep amber highlights later.
Step 2: The Precision Sear
Heat your oil in the skillet over medium-high heat until it shimmers but isn’t smoking. Carefully lay the chicken away from you into the pan; you should hear a vigorous, consistent sizzle immediately.
Cook for 4-5 minutes per side. Resist the urge to move the chicken; it needs undisturbed contact with the heat to develop that signature golden-brown, crispy exterior.
Step 3: Charring the Lemon Wheels
While the chicken rests on your wire rack, wipe out any burnt breadcrumbs from the pan. Add a tiny drop of oil and place your lemon slices in the hot skillet for 60 seconds per side.
You are looking for blackened edges and caramelized centers. Set these aside; they are the “charred lemon slices” that complete the visual aesthetic on your matte white ceramic plate.
Step 4: Crafting the Silky Lemon Garlic Sauce
Lower the heat to medium and add a tablespoon of butter and your minced garlic. Sauté for 1-2 minutes until fragrant and pale gold—do not let the garlic turn dark brown, or it will taste bitter.
Deglaze the pan with 1/4 cup (60ml) of chicken stock and the lemon juice. Simmer until the liquid reduces by half, then whisk in the remaining cold butter, one cube at a time, until a glossy sheen forms.
Expert Tips for a Professional Finish
- Temperature Control: If the panko is browning too quickly before the chicken is cooked through, lower the heat slightly. The breading should reach a “deep amber” without crossing into burnt territory.
- The Butter Emulsion: Never let the sauce come to a rolling boil once you start adding the cold butter. High heat will break the emulsion, leaving you with a thin, greasy sauce instead of the “thick, silky” texture we desire.
- The Parsley Dusting: Chop your parsley at the very last second. This preserves the bright green color which provides the necessary visual contrast against the golden chicken.
- Cracked Black Pepper: Use a coarse grind for the pepper. The larger “cracks” provide a rhythmic textural pop that matches the panko’s crunch.
Storage, Reheating, and Make-Ahead Advice
Chicken Christopher is best served immediately to enjoy the contrast of the hot sauce against the crispy breading. However, leftovers can be stored in an airtight container for up to 3 days.
To reheat, avoid the microwave as it will make the breading rubbery. Instead, place the chicken in a 350°F (175°C) oven for 10 minutes until the crust crisps back up. Reheat the sauce gently in a small saucepan with a splash of water to loosen it.
While you can bread the chicken a few hours in advance, do not freeze the fully cooked dish, as the lemon butter sauce will separate upon thawing.
What to Serve with Your Chicken Christopher
To keep the focus on the lemon garlic profile, pair this dish with light, airy sides. A simple oriental chicken salad offers a crisp contrast, while a bed of buttered noodles or roasted potatoes works perfectly to soak up the extra sauce.
If you are looking for a complete menu, this weeknight chicken dinner is versatile enough to be served alongside a simple green salad or even a pepperoncini chicken salad for a spicy kick.
For those who enjoy global flavors, you might find the aromatic profile of this sauce reminds you of a classic French mustard chicken, proving that butter and acidity are a universal language of deliciousness.
Frequently Asked Questions
Yes, but they will require a longer cooking time. Ensure they are boneless and skinless, and pound them to a uniform thickness for even searing and breading contact.
Ensure the chicken is patted completely dry before the flour dredge, and make sure to firmly press the panko into the egg wash. Once the chicken hits the pan, do not move it for at least 4 minutes to allow the crust to set.
They are similar, but Chicken Christopher typically features a thicker, panko-based breading and a more emulsified, buttery garlic sauce, whereas Piccata uses a light flour dredge and often includes capers.
The secret is using cold, cubed butter and whisking it into a reduced warm liquid (lemon juice and stock) over medium-low heat. This mechanical action creates an emulsion that results in a thick, silky, and glossy sauce.
Charring the lemon wheels caramelizes the natural sugars and releases fragrant oils from the rind, providing a smoky, complex acidity that cuts through the richness of the butter sauce.
The Definitive Chicken Christopher Recipe
Chicken Christopher: The Ultimate Pan-Seared Lemon Garlic Butter Recipe
Ingredients
Equipment
Method
- Dredge pounded chicken in seasoned flour, dip in beaten eggs, then coat thoroughly in panko, pressing to adhere.
- Heat oil in skillet over medium-high. Sear chicken for 4-5 minutes per side until deep golden-brown and cooked to 165°F. Remove to a wire rack.
- In the same skillet, sear lemon wheels for 60 seconds per side until charred. Set aside.
- Sauté minced garlic in 1 tbsp butter for 1 minute. Add stock and lemon juice; reduce by half. Whisk in remaining cold butter cubes one at a time until glossy.
- Place chicken on matte white plate. Drizzle sauce over the center. Garnish with parsley, cracked pepper, and charred lemon wheels.
Notes
Rest the chicken on a wire rack to keep the bottom of the breading crispy.
Take the Bistro Home with You
Mastering the Chicken Christopher is a rite of passage for any home cook looking to elevate their evening meals. The combination of the “shattering” panko crust and that glossy, garlic-flecked sauce creates a sensory experience that is truly unmatched.
We invite you to share your results with us! Did you get those perfect charred lemon wheels? Let us know in the comments below, and don’t forget to follow us on Pinterest for more visually stunning recipe inspiration.